In the world of design, prototyping is a crucial step that bridges the gap between ideation and final product development. It allows designers to visualize and test their ideas, ensuring that user experiences are seamless and intuitive. Figma, a powerful web-based design tool, has emerged as a favorite among designers for creating interactive prototypes and user flows. In this article, we’ll walk you through a step-by-step guide on how to effectively prototype in Figma, enabling you to bring your design concepts to life.
What is Prototyping?
Prototyping refers to the creation of an early model of a product. This approach helps explore concepts and gather feedback before final development. In digital design, prototypes can vary from simple wireframes to detailed interactive mockups. The main purpose is to simulate user interactions and validate design choices early in the project.
Benefits of Using Figma for Prototyping
Figma offers several advantages that make it an excellent choice for designers:
- Collaborative Features: As a cloud-based tool, Figma allows multiple users to work on the same project simultaneously. This enhances collaboration and facilitates feedback.
- Ease of Use: The user-friendly interface makes it accessible for both beginners and experienced designers, allowing them to create prototypes without extensive training.
- Comprehensive Tools: Figma includes features such as components, smart animations, and various prototyping functionalities that cater to all your design needs.
Step-by-Step Guide to Prototyping in Figma
Step 1: Set Up Your Figma File
To begin your project, open Figma and select “New File.” Next, create frames using the Frame tool (F) to set up artboards representing different screens or states within your application or website.
Step 2: Design Your Screens
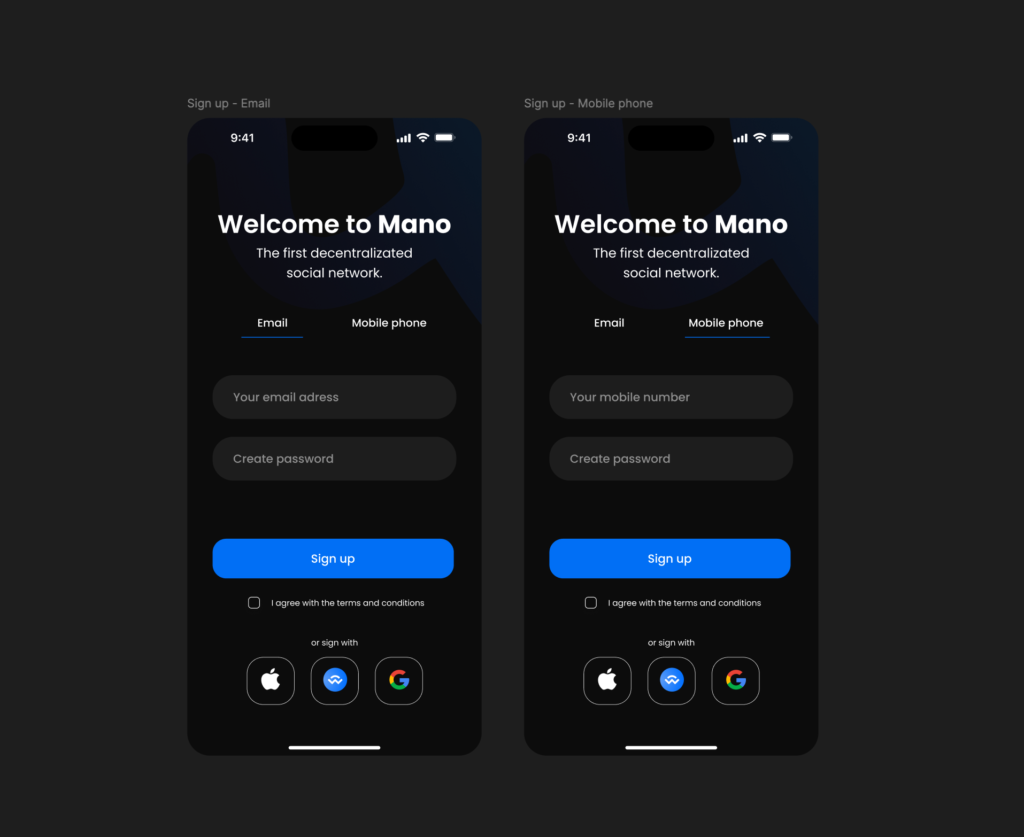
In this step, incorporate UI elements by utilizing Figma’s design tools. Add buttons, text boxes, images, and other interface components to your frames. You can either create elements from scratch or use existing components from Figma’s library. Additionally, ensure consistency by applying shared styles for typography, colors, and buttons across your design.
Step 3: Create Components
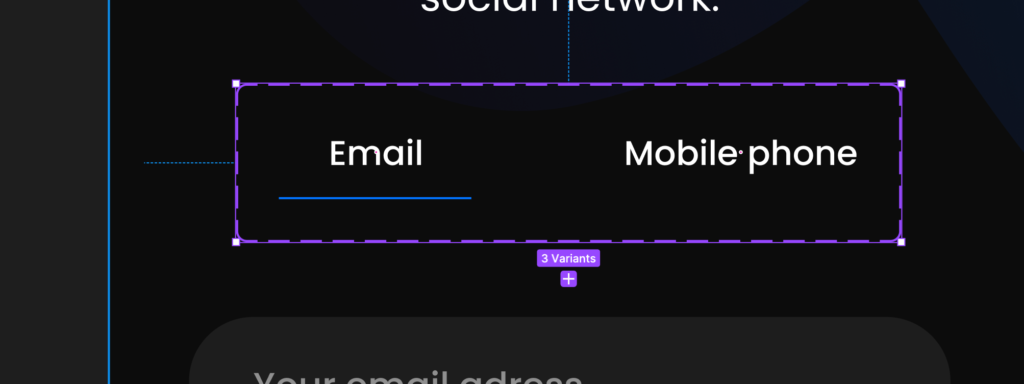
Convert reusable UI elements, like buttons or icons, into components. To do this, select the elements and right-click to choose “Create Component” (or use Ctrl/Cmd + Alt + K). This practice maintains consistency and allows for easy updates. Furthermore, for components with multiple states (e.g., hover or active), create variants to manage these states effectively.
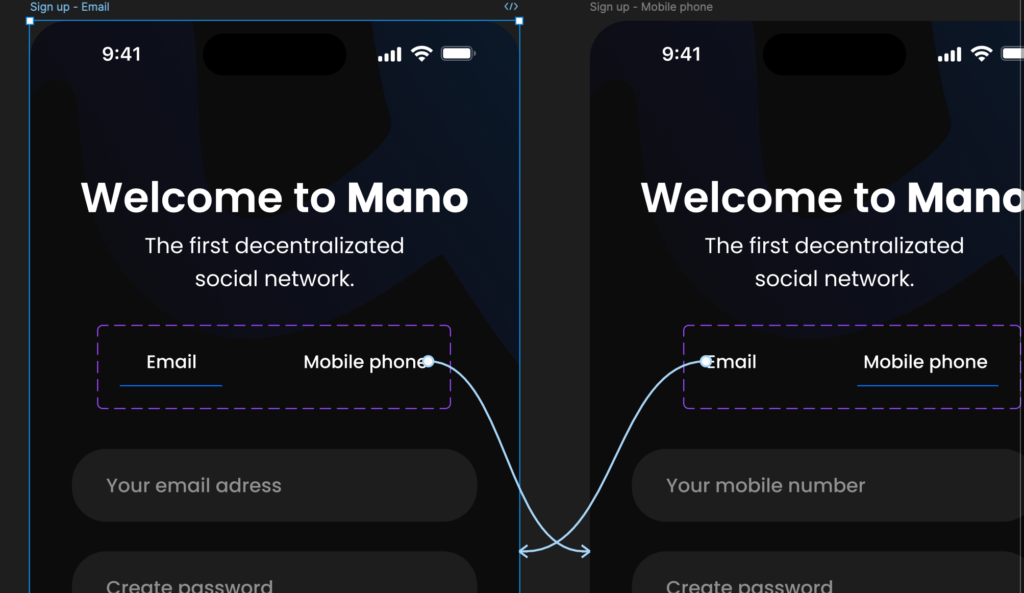
Step 4: Add Interactions
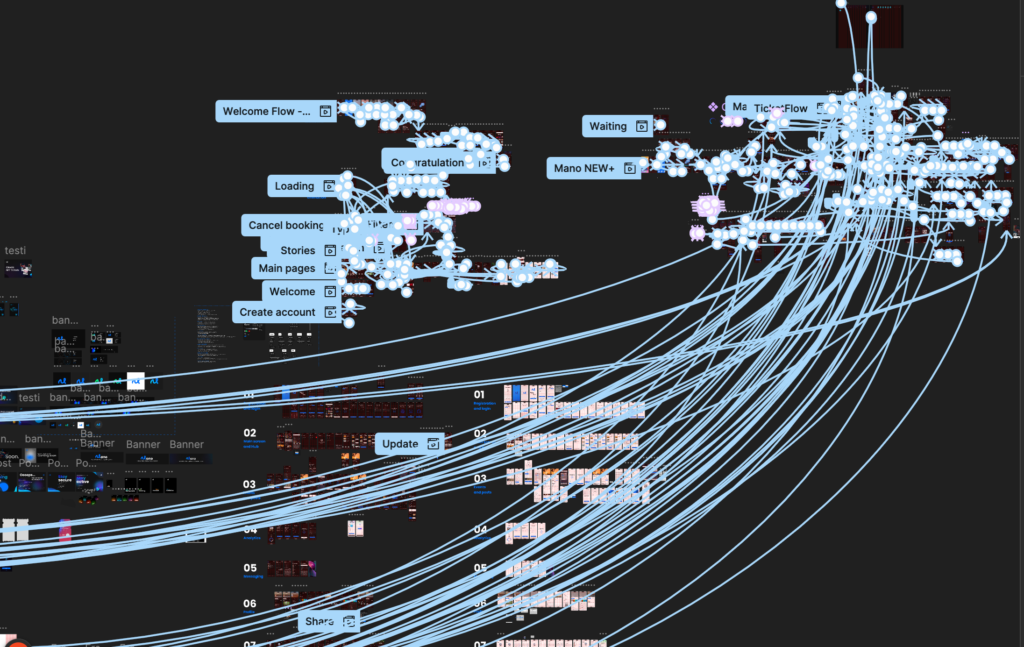
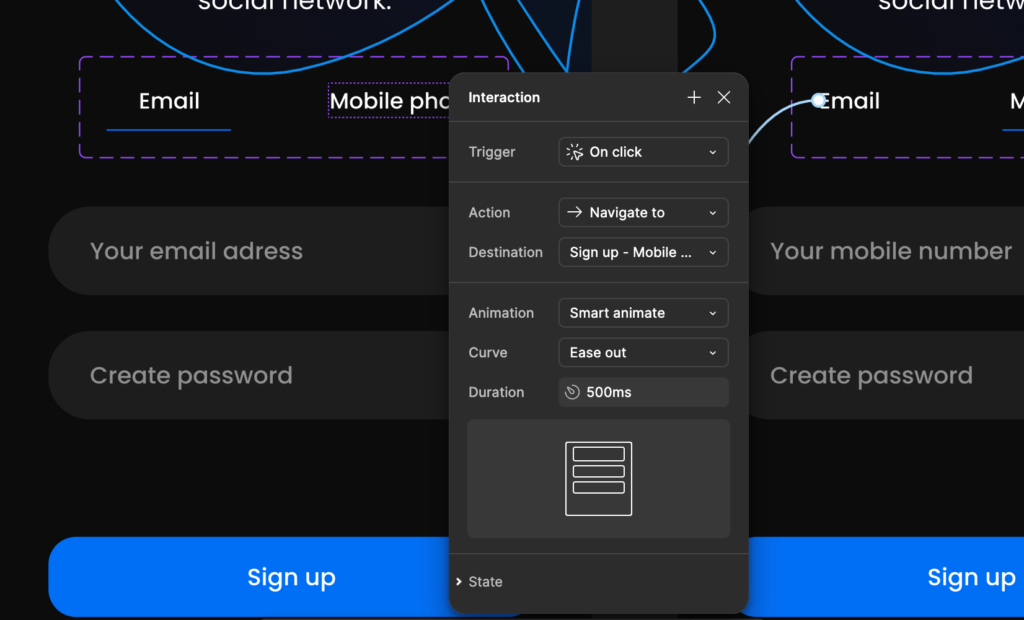
Now, switch to Prototype mode by clicking on the “Prototype” tab located at the top right of the Figma interface. Select an element (like a button) that will trigger an action. Then, drag the blue arrow that appears to connect it to the target frame, establishing a link between the two screens. After creating a link, customize the interaction parameters such as triggers (e.g., “On Click,” “On Hover”), animation types (e.g., “Navigate To,” “Open Overlay”), and transition effects (e.g., “Instant,” “Dissolve,” “Smart Animate”).
Step 5: Implement Smart Animate
To enhance transitions with Smart Animate, ensure that elements share the same name across frames. Figma will automatically animate these changes when using Smart Animate. After setting this up, click on the play icon in the upper-right corner to enter presentation mode. This allows you to interact with your prototype as if it were a live application.
Step 6: Test Your Prototype
Collect feedback by sharing your prototype link with team members or stakeholders. Figma makes it easy to share prototypes via a link for viewing and commenting. Use the feedback gathered to make necessary revisions to your design and interactions.
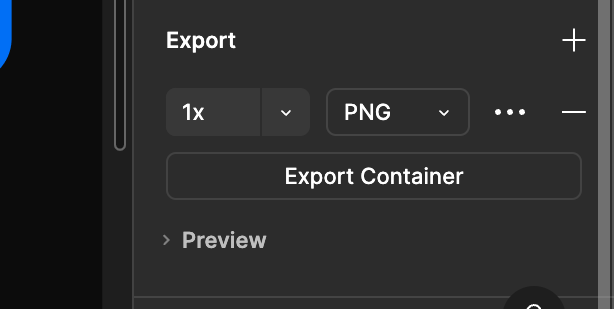
Step 7: Export Assets (if needed)
If you need to provide designs or assets for development, start by selecting any UI elements or frames that should be exported. Adjust export settings in the right sidebar, specifying format and scale before clicking “Export.” This allows developers to access your designs directly.
Figma prototype is a powerful way to enhance collaboration and creativity within design projects. By following this comprehensive guide, you can create interactive prototypes that effectively illustrate your ideas while facilitating user testing and feedback collection. As you become more proficient with Figma’s prototyping capabilities, you’ll discover new ways to streamline your design process and improve user experiences.
Whether you’re designing a mobile app, website, or any digital product, mastering prototyping in Figma will significantly elevate your design skills and help you realize your creative visions!